A ferrule connection depends on more than tightening a nut: the tube must match the fitting, the cut must be square, and the tube must reach the body shoulder before tightening begins. By the end, you will know how to select, prepare, assemble, inspect, test, and reassemble a tubing connection under workshop and site conditions.
Key takeaways
- Match tube diameter, material, measurement system and pressure rating.
- Use the manufacturer’s assembly instructions for ferrule bite and tightening turns.
- Cut tubing square, deburr it and keep ferrule faces clean.
- Replace damaged ferrules before reassembling a connection.
Match the Tube, Fitting and Service Before Assembly
A successful ferrule fitting installation in Mumbai starts with compatibility checks, not a wrench. Confirm that the tube, fitting body, nut, and ferrules belong to the same manufacturer series and match exactly by tube outside diameter, metric or inch system, material, and pressure rating.
A visually similar ferrule from another series can leave you with an unvalidated seal.
1. Match the tube to the fitting by OD, wall thickness, material, and tubing condition. Confirm the tube can enter fully and rest against the fitting-body shoulder; a tube that stops short can pull out or leak.
2. Match the assembly to the service fluid, pressure, temperature, vibration, thermal cycling, and cleaning chemicals. Mumbai’s humid, chloride-bearing coastal air affects storage and material selection, but it does not permit a different tightening method.
3. Do not choose 316 or 316L stainless steel solely because the work is in Mumbai. Select the alloy and surface finish for the process and chloride exposure; 316L helps with lower carbon requirements in welded assemblies but cannot correct poor assembly or chloride attack.
4. Request material certificates and lot traceability for pressure-service tube and fittings. Check that packaging has kept sealing surfaces clean, undamaged, and dry.
5. Keep the maker’s assembly instructions and specified gap gauge available. Use the gauge to verify nut position after assembly; do not replace the specified procedure with installer feel or extra tightening.
Prepare the Tube and Assemble the Ferrule Connection
1. Cut the tube square to its axis with a tube cutter, not a hacksaw. Remove internal and external burrs, clean away cutting oil and dust, and inspect the gripping area for scratches, dents, or ovality. A damaged or angled end can stop the tube against the fitting shoulder and leave the seal incomplete.
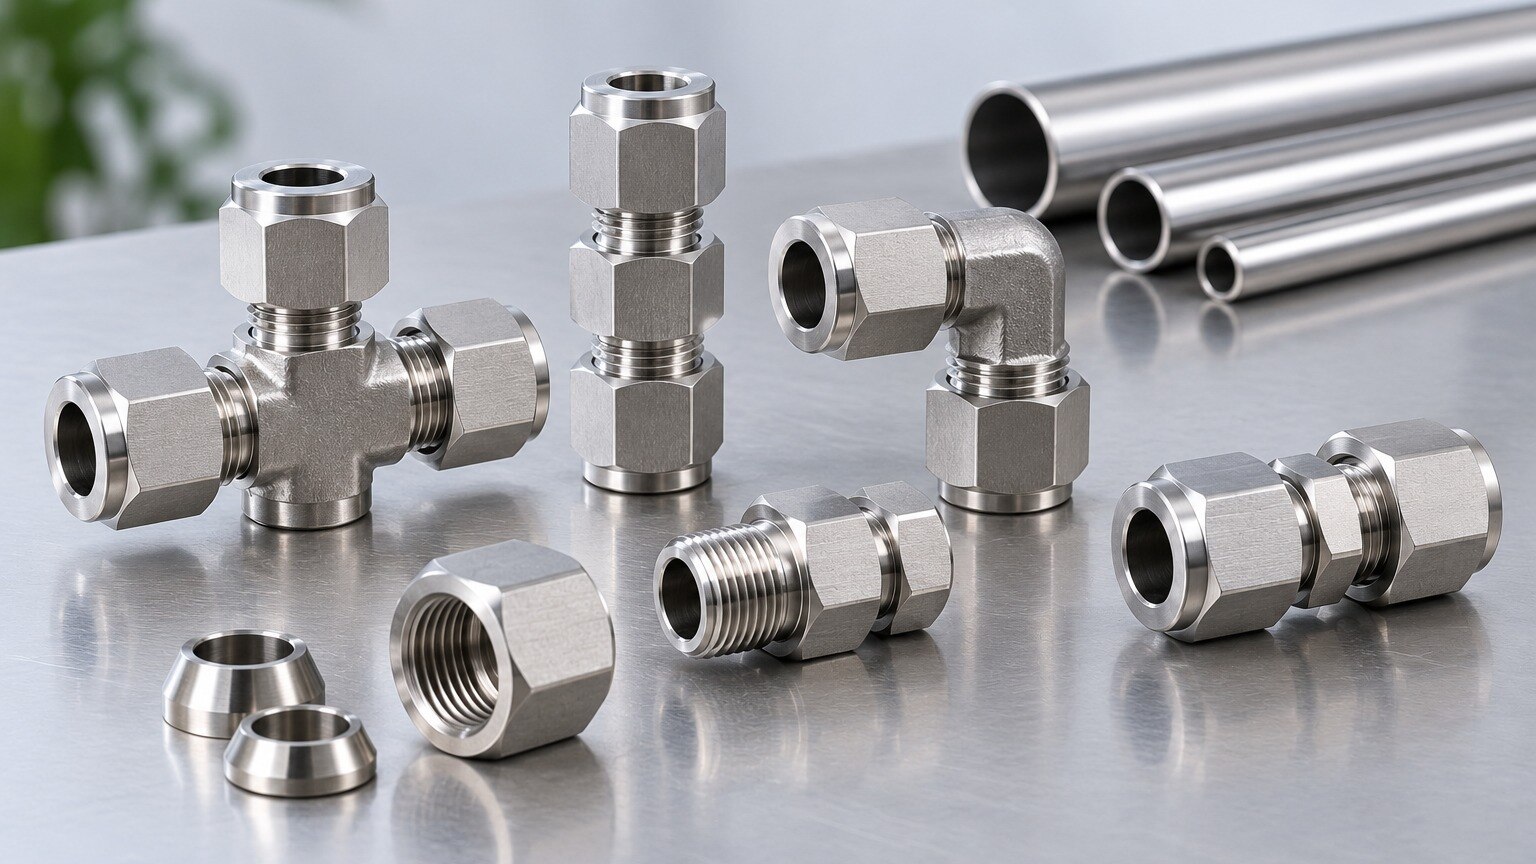
2. Confirm that the nut and ferrule belong to the same fitting series and match the tube outside diameter. For a single-ferrule fitting, slide the nut onto the tube, followed by the ferrule with its specified orientation facing the fitting body.
For a two-ferrule fitting, install the nut, back ferrule, and front ferrule in the manufacturer’s stated order and orientation; do not substitute ferrules from another brand or series.
3. Push the tube fully into the fitting body until it bottoms against the internal shoulder. Hold it there while turning the nut by hand until it is finger-tight. If the tube stops early, remove the assembly and find the burr, dirt, or damaged component instead of forcing the nut.
4. Mark the nut and fitting body, then tighten with a spanner for the manufacturer’s specified number of turns. The ferrule fitting assembly process is not improved by extra force. The front ferrule makes the primary seal, while the back ferrule grips the tube against pull-out and vibration.
5. Do not apply PTFE tape or thread sealant to the tube, ferrules, or compression threads. Support and bend the tube separately; tightening a misaligned tube can overload an industrial tubing ferrule connection.
Understand Ferrule Bite and Apply the Specified Tightening
The seal comes from controlled deformation, not from thread sealant. As the tube nut advances on the fitting body, it drives the ferrules forward and applies axial force to the prepared tube.
In a correctly assembled industrial tubing ferrule connection, the tube remains fully against the body shoulder while this force creates metal-to-metal sealing and grip.
| Component | Function during tightening |
|---|---|
| Front ferrule | Enters the body’s cone, seals against the tube outside diameter, and seals against the fitting body |
| Back ferrule | Bites into the tube behind the front ferrule and resists pull-out, vibration, and tube movement |
| Tube nut | Supplies axial compression as its threads advance on the body |
| Fitting body | Provides the internal shoulder, cone, and mating thread that guide and contain the ferrules |
Do not choose a tightening distance by appearance. Run the nut down finger-tight, then apply the manufacturer’s specified wrench turns, torque value, or installation-gauge setting. Many standard inch and metric fittings use 1¼ turns from finger-tight for initial assembly, but that figure does not apply to every size, series, material, or manufacturer.
- Hold the tube firmly against the shoulder while turning the nut.
- Stop at the specified turn or gauge position; forcing the nut beyond it can damage the tube and ferrules.
- If the nut stops short, the tube pulls out, or leakage appears during testing, depressurise the line and inspect the assembly rather than adding random turns.
- Use only the matching ferrules and nut for that fitting series; identical tube outside diameter does not make components interchangeable.
Install, Inspect and Reassemble Connections on Mumbai Sites
The practical answer to how ferrule fittings are installed in Mumbai is to keep the manufacturer’s procedure unchanged while controlling site conditions. Seal tube ends and fitting ports against dust, remove cutting oil with a clean, compatible solvent, and segregate stock by tube OD, metric or inch system, material, and fitting series.
A mismatched nut or ferrule can look correct yet lack a validated pressure rating.
Before tightening in a cramped panel or plant area:
- Position the fitting where a wrench and inspection gauge can reach it; do not compensate for poor access by guessing the tightening turns.
- Route tubing with the correct bender, leaving support near the connection and avoiding forced alignment, unsupported spans, and vibration.
- Clean and support the completed circuit before testing.
- Use a compatible liquid for pressure testing where practicable; compressed gas stores more hazardous energy.
- Check the nut position with the maker’s gap gauge after assembly.
After maintenance, isolate and depressurise the line before loosening anything. Inspect the tube end, fitting body, nut, and ferrules for scoring, distortion, contamination, or corrosion; replace damaged parts rather than hiding them under retightening.
Reassemble the same fitting series according to the manufacturer’s reassembly instructions, confirm insertion depth, and perform the specified final tightening and leak test again. Humid, chloride-bearing coastal air makes clean storage and capped components especially important.
Specify and Buy Compatible Ferrule Fittings in Mumbai
Send the supplier a complete fitting specification, not “SS ferrule fitting.” If you want to buy ferrule fittings in mumbai, state:
- Tube outside diameter and unit system: metric or inch
- Tube material and wall thickness
- Fitting material, such as 316 stainless steel
- Operating and design pressure range
- Minimum and maximum service temperature
- Connection type, such as tube-to-tube, tube-to-thread, or tube-to-valve
- Single-ferrule or two-ferrule construction
- Required standard or manufacturer series
- Quantity, end configuration, and delivery location
Ask for the body, nut, front ferrule, and back ferrule to come from the specified series. A nut or ferrule that looks identical can have different geometry and no validated seal or pressure rating when mixed with another body.
For pressure service, request the material certificate, heat or batch number, and lot traceability for both tubing and fittings. Confirm that the certificate identifies the supplied material grade rather than only stating “stainless steel.” Mercury Metalinks can be useful when your purchase needs stock availability matched with these traceability details, not merely a catalogue description.
On receipt, check labels against the purchase order and keep stock segregated by tube OD, metric or inch system, material, and series. Reject packaging with dirt, impact damage, or exposed sealing surfaces; humid, chloride-bearing Mumbai air can mark machined parts before assembly. Keep each ferrule set with its matching nut and body.
Related product
 | FERRULE FITTINGS Mercury Metalinks Mercury Metalinks is a trusted supplier and stockist of premium-quality Ferrule Fittings, offering a comprehensive range of... View product → |
Frequently asked questions
How do you match a tube and ferrule fitting before assembly?
Confirm the tube outside diameter, inch or metric system, material, pressure rating and manufacturer series. Match the fitting body, nut and ferrules to those specifications.
What is the correct ferrule fitting assembly process?
Cut the tube square, remove burrs, clean the tube and insert it fully into the fitting body. Tighten the nut according to the manufacturer’s specified turns or torque.
How do you check ferrule bite after installation?
Inspect the connection for correct tube insertion, visible damage and leakage during a controlled pressure test. Use the manufacturer’s inspection gauge or gap guidance when supplied.
Can you reassemble a ferrule connection on a Mumbai site?
Depressurise and isolate the line first. Inspect the tube and fitting, replace damaged ferrules, and follow the manufacturer’s reassembly instructions instead of repeating initial installation torque.
What should you specify when buying ferrule fittings in Mumbai?
Provide tube outside diameter, inch or metric measurement, material, pressure and temperature requirements, end connection type, manufacturer series and required quantity.